How do I rack a .5U blade or a 2U Flex Chassis?
1U blade or 2U Flex Chassis installation & removal
PLEASE NOTE: The pictorial illustrations in this FAQ show a 2U Flex chassis, however the same procedures are applicable to the 1U blade except for the fact that the 1U chassis is 1U shorter in height, uses a different size rear mounting bracket, and has fewer mounting screws.
Preparing the Cabinet
STEP 1 : Install 16 rack nuts (8 in the back and 8 the in front), into the position in the cabinet where thechassis will be installed. Make sure to place the rack nuts in the same positions (numbered in the front and back), to ensure the chassis will be level.
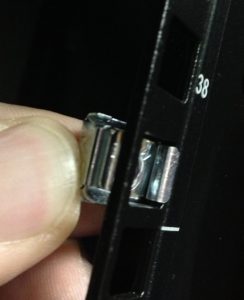
The nuts should snap into place.
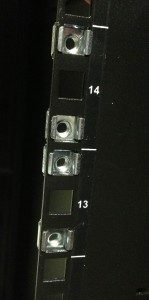
4 rack nuts after properly installed.
STEP 2 : Remove rear mounting brackets from the Flex chassis. The ears will slide out by pulling on them, and are not held in with screws.
STEP 3 : Install the two rear mounting brackets, one per side, in back side of the cabinet as shown in the photo below. Do not tighten the screws, as some play will be needed when racking the chassis.
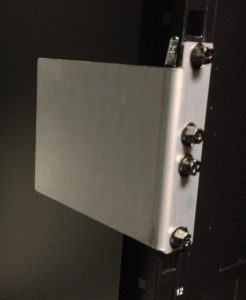
Properly installed rear bracket.
Installing the chassis in the cabinet
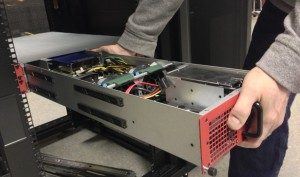
STEP 4 : This step requires two people: one to hold the chassis in place and the other person to help guide the back of the chassis into the rear mounting brackets mounted in the previous step. The right side bracket (viewed from the front) is 1″ longer than the left side to aid in alignment while installing.
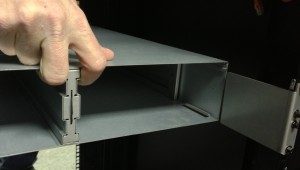
Properly lining up chassis to slide onto rear mounting brackets.
STEP 5 : Once the back of the chassis has been slid onto the rear mounting brackets, secure the front of the chassis with the screws (4 on each side), as shown below.
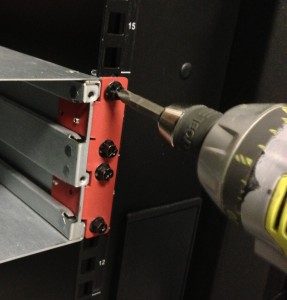
Mounting the front chassis screws.
LAST STEP : Tighten the screws holding the rear brackets. You should now be able to safely install the blade(s) by sliding them into their places in the front of the chassis and hand tighten the two hand screws on the front of the device (see below).