Provisioning a node
Before an admin can provision a node, there are things that need to be done
Once the above is completed, in the web interface go to “Provisioner and Booting” → “Boot Status”, then power on or reboot a node.
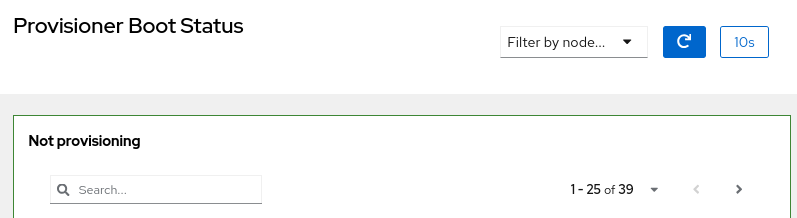
Not provisioning
This section is to show all nodes that are currently not in a provisioning status.
Historical information about the boot and the node can be found by clicking ![]() to view the “Boot log”. The “Boot console” button, indicated by >_ , is no longer available when a node is not provisioning, while the “Power control” and “Edit entry” options can still be accessed.
to view the “Boot log”. The “Boot console” button, indicated by >_ , is no longer available when a node is not provisioning, while the “Power control” and “Edit entry” options can still be accessed.

Nodes that have not provisioned will appear as “Never Provisioned”

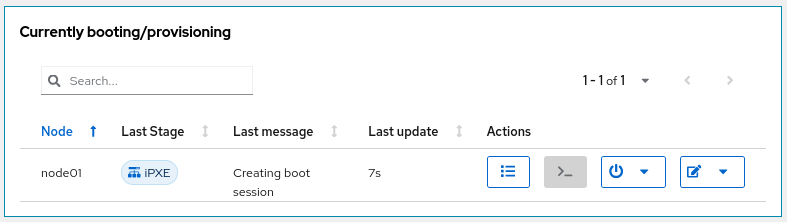
Currently booting/provisioning
When a node first boots into PXE it will show up in the “Currently booting/provisioning” menu. Each node will show the recorded “Last Stage” and the “Last message” which are useful for troubleshooting errors and for seeing current status. The “Last update” tells how long ago there was an update. “Actions” are ways the admin can interact with the node.
“View boot log” - shows the history of the boot, which is useful for troubleshooting.
“Connect to boot console” - allows the admin to view interactively the node as it boots. Should the node fail to boot, the admin can interact with the node to troubleshoot why.
“Device power control” - allows the admin to power on/off/reset the node via multiple interfaces (ssh, IPMI, PSU - options vary depending on configuration and hardware).
“Edit device config entry” allows the admin to edit the node configuration directly from this interface
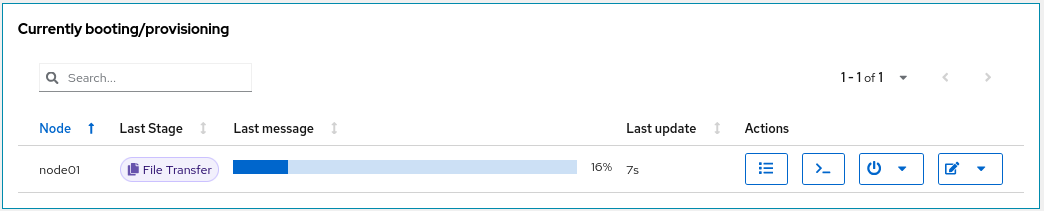
Example of further progress
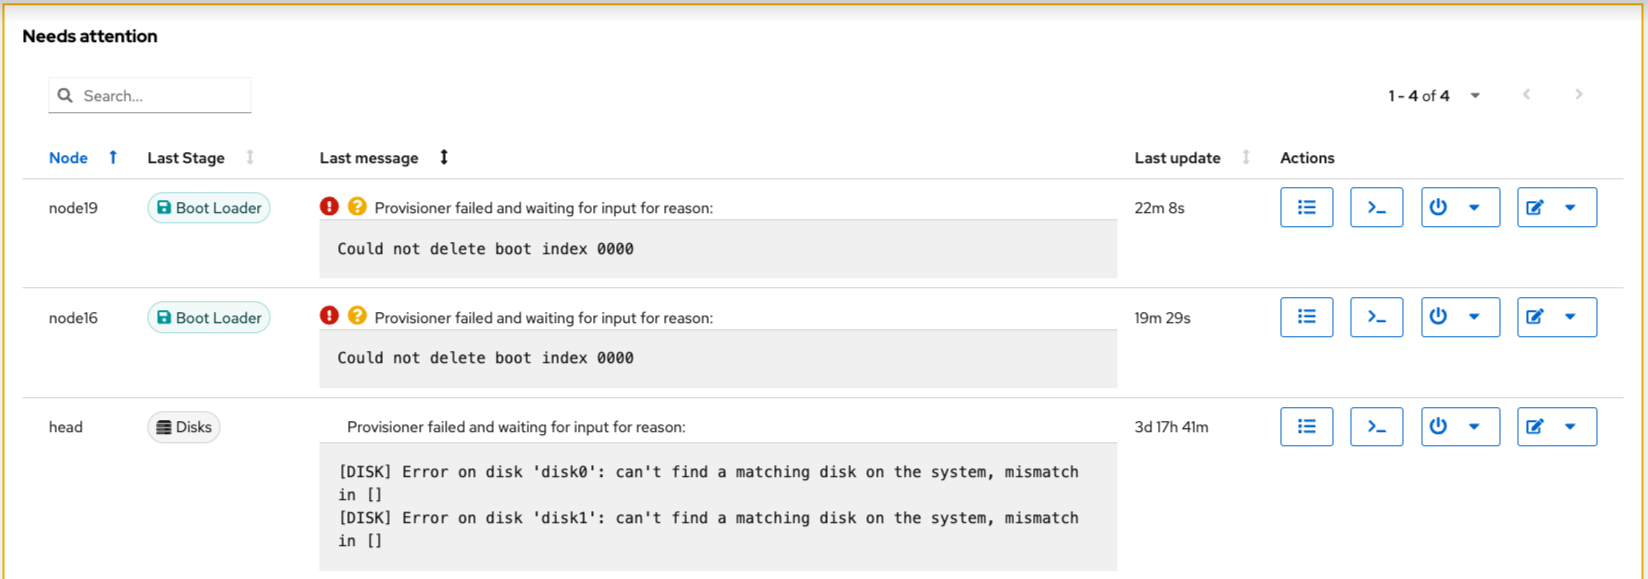
Needs Attention
Anything that shows up in this section needs an admin to address the issues. A few examples of misconfiguration are shown.